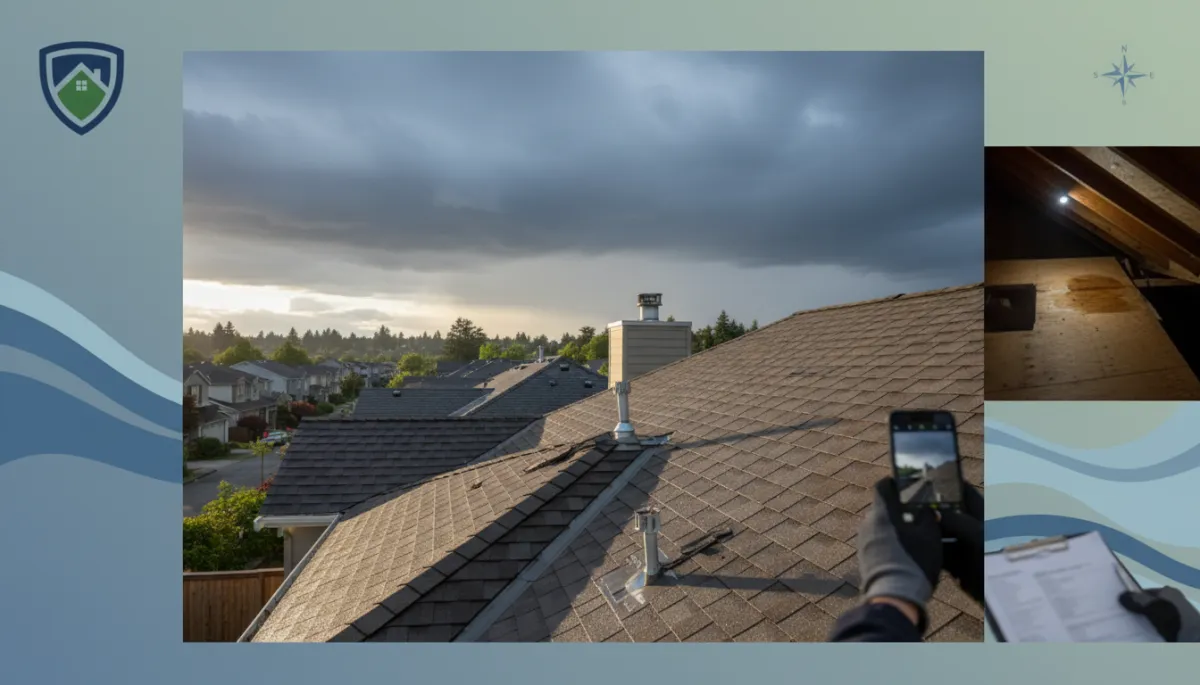
Storm Damage Roof Inspection Guide for Puget Sound
Roofing, Storm Damage, Puget Sound, Home Maintenance
Storm Damage Roof Inspection: A Step-by-Step Guide for Puget Sound Homeowners
Did a storm just hit your Snohomish County home? Don't wait — roof damage can worsen fast. Snohomish Roofing Company provides rapid storm damage inspections throughout the Puget Sound area. Call (360) 913-2021 or visit https://snohomishroof.com right now to schedule your free post-storm inspection.
Why Post-Storm Roof Inspections Matter in the Puget Sound Region
In the Puget Sound area, storms rarely arrive alone. Strong wind events, days of steady rain, saturated soils, and falling branches often combine to put exceptional stress on your roof. The National Weather Service routinely issues wind and flood advisories for Western Washington, and local agencies warn about landslides and water-related damage during our wet seasons. When a storm passes, your roof is your first line of defense against the next round of weather — and any hidden weakness can quickly turn into a leak, interior water damage, or even structural issues.
A careful, methodical roof inspection after a storm helps you catch problems early, protect your home, and prepare clear documentation for your insurance company. The following step-by-step guide is tailored specifically for homeowners in Snohomish County and the broader Puget Sound region, where wind-driven rain, tree debris, and long periods of moisture are common. Use it as a reference — and when in doubt, bring in a licensed roofing professional such as Snohomish Roofing Company to perform a full, safe inspection.
Step 1: Safety First — Stay Off the Roof
After a storm, your roof may look stable from the ground, but shingles, sheathing, and decking can be loosened or saturated. Walking on a compromised surface is extremely dangerous, especially when it is wet, mossy, or covered in debris — all common conditions in the Pacific Northwest. National and industry safety guidelines emphasize fall protection, proper training, and specialized equipment for rooftop work, particularly after severe weather. Most homeowners do not have this equipment, and a fall from even a single-story roof can cause serious injury.
For that reason, your post-storm inspection should be a visual inspection from safe locations only: the ground, upper-story windows, and inside your attic. Do not climb onto the roof, do not attempt to clear large branches, and do not place ladders near downed power lines or unstable surfaces. If you suspect significant damage, call Snohomish Roofing Company immediately so trained technicians can assess the roof using proper safety procedures and, when appropriate, modern tools such as harnesses and fall protection systems.
Step 2: Ground-Level Roof Inspection Checklist
Begin your inspection with a slow walk around the perimeter of your home. Use binoculars if you have them, and take your time. You are looking for visible signs of storm impact that may indicate more serious issues on the roof surface. Work methodically, side by side, rather than jumping between areas — this makes it easier to photograph and document what you find for insurance purposes later on.
- Missing or displaced shingles: Look for bare patches, shingles that are obviously missing, or pieces of shingles on the ground. Wind gusts common in Puget Sound storms can lift and remove shingles, exposing the underlayment or even bare wood.
- Curled, lifted, or misaligned shingles: Even if shingles remain in place, edges that appear raised or uneven may no longer be sealed. This creates pathways for wind-driven rain to penetrate the roof system over time.
- Flashing and metal components: Examine areas around chimneys, skylights, vent pipes, and roof-to-wall intersections. Bent, lifted, or missing metal flashing is a red flag, as these are critical waterproofing details in our heavy-rain climate.
- Gutters and downspouts: Check for sagging, pulling away from the fascia, or visible dents from branches. Overflowing or damaged gutters can dump water against siding and foundations, compounding storm damage and increasing flood risk identified by local flood management agencies.
- Debris on the roof: Note any branches, leaves, or other debris sitting on the roof surface or lodged in valleys. While small debris may be mostly cosmetic, larger pieces can puncture shingles or trap moisture, leading to long-term deterioration and potential water intrusion.
- Soffits, fascia, and siding: Look for cracks, holes, or sections that appear loose or warped. These areas can be entry points for wind-driven rain and pests, and they often show early signs of hidden roof damage above them.
As you move around the property, also observe the ground. Shingle granules that look like coarse sand around downspouts or in landscaping beds may indicate accelerated wear or storm-related granule loss on your roof, a common issue after high-wind and heavy-rain events in the region. Make notes and take photographs of each area of concern as you go.
Step 3: Attic Inspection for Leaks, Moisture, and Daylight
Once you have completed your exterior walk-around, move indoors to inspect your attic or upper crawlspace. This step is especially important in the Puget Sound climate, where persistent rain and high humidity can make small leaks difficult to spot from the outside but very damaging over time inside your home. Choose a calm period after the storm, bring a flashlight, and walk only on secure joists or decking if you must enter the space physically. If access is limited or unsafe, view what you can from the attic hatch.
- Look for active drips or standing water: Any visible dripping, pooling water, or damp insulation is a sign that your roof system has been compromised. Even slow drips can lead to mold, structural rot, and stained ceilings if not addressed quickly.
- Check for water stains and discoloration: Brown, yellow, or dark stains on rafters, decking, or insulation may indicate past or ongoing leaks. Pay close attention to areas beneath valleys, around chimneys, and near vent penetrations, where flashing damage often shows up first.
- Observe daylight coming through the roof: Turn off your flashlight briefly and look for pinpoints or streaks of daylight. Small gaps may be nail holes or ventilation features, but larger openings or new light sources after a storm are cause for immediate concern and likely require professional repair.
- Assess odor and humidity: A musty smell, excessive condensation on nails, or visibly damp wood can signal poor ventilation or ongoing moisture intrusion. In our damp environment, these conditions can quickly lead to mold growth if left unresolved.
Document everything you see in the attic with photos and notes. If you notice active leaks, place buckets or plastic sheeting to protect belongings and ceilings below, but avoid disturbing wet insulation or structural members more than necessary until a professional can evaluate the damage.
Step 4: What to Photograph for Your Insurance Company
Thorough documentation is essential when filing a roof damage claim with your homeowner’s insurance in Washington. Insurers typically expect clear, date-stamped evidence of both the storm’s impact and the resulting damage. Detailed photos and notes can help streamline the claim process, support your case, and reduce disputes over the scope of repairs. Many consumer insurance resources stress the importance of this step in achieving a fair settlement.
- Wide shots of each side of the home: Capture the overall condition of the roof, siding, and gutters from multiple angles. These photos provide context and help show the location of specific problem areas relative to the rest of the structure.
- Close-ups of visible damage: Photograph missing shingles, lifted flashing, bent gutters, and any debris impacts. Take multiple images from different distances to show both detail and scale. If you can safely zoom in from the ground or a window, do so rather than climbing onto the roof.
- Interior and attic evidence: Document ceiling stains, peeling paint, bubbled drywall, wet insulation, and any active leaks. Include photos of buckets or temporary protection you have put in place to prevent further damage, as insurers often encourage reasonable mitigation efforts.
- Damaged personal property: If the roof leak has affected furniture, flooring, or other belongings, photograph these items as well. Keep receipts or records for any emergency purchases, such as tarps or fans, as these may be reimbursable depending on your policy.
When Snohomish Roofing Company performs a storm damage inspection, we also create professional photo documentation and written findings that you can share directly with your insurance adjuster. This third-party report can be extremely helpful in clarifying the cause and extent of damage in the eyes of your insurer.
Step 5: Common Storm Damage Types on Puget Sound Roofs
The Puget Sound area faces a combination of wind, rain, and tree-related hazards that create a distinctive pattern of roof damage. Understanding what is typical here can help you recognize problems early and explain them clearly to your insurance company and contractor. Some of the most frequent storm-related roof issues we see include the following:
- Missing shingles: Strong gusts, especially during wind advisories issued by the National Weather Service, can rip shingles completely off the roof. Exposed underlayment or wood sheathing is highly vulnerable to immediate water intrusion during our extended rainy periods.
- Lifted or damaged flashing: Metal flashing around chimneys, skylights, sidewalls, and valleys can be pried up by wind or struck by falling branches. Once flashing is bent or separated, water can travel behind it and leak into walls or ceilings, sometimes far from the actual entry point on the roof.
- Granule loss on asphalt shingles: Heavy rain and wind can strip protective granules from shingle surfaces, especially on older roofs. You may see these granules collecting in gutters or at downspout outlets. Without granules, shingles age faster under UV exposure and become more susceptible to future storm damage and leaks.
- Gutter and downspout damage: Impact from branches, ice, or heavy water flow can bend, detach, or clog gutters and downspouts. In a region where local agencies emphasize flood and drainage management, properly functioning gutters are critical to directing water safely away from your roof, siding, and foundation.
- Debris punctures and impact damage: Limbs from our many tall evergreens and deciduous trees can cause punctures, broken shingles, or crushed roof sections. Even if the roof surface appears intact, hidden fractures in decking or framing may require professional evaluation and repair.
Because many of these damage types worsen slowly with each new storm, it is important not to dismiss small issues as “cosmetic.” A prompt inspection and repair today can prevent more costly structural and interior repairs in the future, particularly in our long wet seasons when roofs rarely get a chance to fully dry out.
Step 6: Temporary Tarping and Preventing Further Damage
Most homeowner’s insurance policies require you to take reasonable steps to prevent additional damage after a covered event. In practice, this often means installing a tarp or temporary covering over damaged roof areas until permanent repairs can be made. However, tarping a roof is hazardous work that involves slippery surfaces, wind exposure, and heavy materials. For your safety, it is strongly recommended that tarping be performed by trained professionals with proper fall protection and equipment, especially on multi-story homes or steep roofs common in Snohomish County neighborhoods.
If you must take immediate action before help arrives, focus on interior protection: move furniture and valuables away from leak areas, place buckets or containers under drips, and cover vulnerable items with plastic sheeting. Save receipts for any emergency materials you purchase, such as tarps, plastic, or fans, as they may be reimbursable under your policy. Then contact Snohomish Roofing Company for emergency tarping and stabilization. Our crews are experienced with post-storm conditions in the Puget Sound area and can quickly secure your roof to reduce further water intrusion while documenting the damage for your insurer.
Step 7: Understanding the Roof Insurance Claim Process in Washington State
While exact procedures vary by insurance company, the general process for filing a roof damage claim in Washington follows a consistent pattern. Being organized and proactive can make the experience smoother and help you receive the coverage to which you are entitled under your policy. Consumer insurance resources emphasize the importance of documentation, communication, and timely action throughout this process.
- Review your policy: Before calling your insurer, read your homeowner’s policy or online account to understand your deductible, exclusions, and any specific requirements for storm or wind damage. Note whether you have replacement cost or actual cash value coverage for your roof, as this affects how your claim is paid.
- Notify your insurance company promptly: Most policies require timely reporting of losses. Call your insurer’s claims line or file online as soon as practical after the storm. Provide the date and time of the event, a brief description of what happened, and any immediate steps you have taken to prevent further damage.
- Document and share evidence: Submit the photographs, videos, and notes you collected during your inspection. If Snohomish Roofing Company has provided an inspection report or repair estimate, share that as well. Clear documentation can help your adjuster understand the extent and cause of the damage more quickly.
- Meet with the adjuster: Your insurer will typically schedule an adjuster to visit your property. When possible, arrange for a roofing professional to be present during this inspection. Having a contractor on-site can help ensure that all damage is identified and that the proposed scope of repairs is sufficient for local building codes and weather conditions in Washington State.
- Review the estimate and settlement: After the adjuster’s visit, you will receive an estimate or statement of loss. Review it carefully, comparing it with your contractor’s recommendations. If you see discrepancies or believe something was missed, request clarification or a reinspection. You have the right to ask questions and advocate for appropriate repairs.
- Complete repairs and submit final documentation: Once the claim is approved, your contractor will perform the work. Keep copies of all invoices and completion documents. Some policies in Washington release a portion of funds upfront and the remainder after proof of completed repairs, so timely submission of paperwork is important.
Snohomish Roofing Company is familiar with the insurance process and can provide detailed estimates, photos, and project documentation tailored to what adjusters typically require. While we do not act as your insurance agent or adjuster, we can help you understand the roofing aspects of your claim and ensure the proposed repairs are appropriate for our local climate and building standards.
Step 8: When to Call a Professional Roofer Immediately
Some storm damage situations require prompt, professional attention to protect your home and your safety. In the Puget Sound region, where additional storms and heavy rains often follow close behind the first one, waiting too long can quickly turn a manageable repair into a major restoration project. Contact a licensed roofing contractor such as Snohomish Roofing Company right away if you notice any of the following:
- Active leaks or ceiling sagging: Water dripping from ceilings, light fixtures, or vents, or any section of ceiling that appears bowed or soft, indicates significant moisture intrusion. This can rapidly compromise drywall and framing and may pose an electrical hazard.
- Large areas of missing shingles or exposed wood: If you can see underlayment or bare decking from the ground, your roof is not providing full protection. With our frequent rainfall, even a short delay in covering these areas can lead to substantial interior damage.
- Tree impact or structural movement: A branch or tree resting on the roof, visible sagging in the roofline, or cracks in interior walls or ceilings may signal structural damage. Do not attempt to remove large limbs yourself; call professionals who can coordinate safe removal and a comprehensive structural assessment.
- Widespread granule loss or advanced wear: If a storm reveals that your roof is nearing the end of its service life, with extensive granule loss, curling, or brittle shingles, a professional evaluation can help you decide whether repair or replacement is the most cost-effective and protective option moving forward.
A professional roofer brings not only safety training and equipment, but also local experience. Snohomish Roofing Company understands how Puget Sound weather patterns, tree species, and building practices interact, allowing us to recommend solutions that stand up to future storms and meet Washington’s building and permitting requirements.
Protect Your Snohomish County Home After the Storm
A storm does not have to mean long-term damage to your Puget Sound home. By following a structured, safety-focused inspection process — staying off the roof, carefully checking from the ground, inspecting the attic for leaks and daylight, documenting everything for insurance, and understanding the most common local damage types — you can respond quickly and effectively when severe weather hits. Temporary tarping and prompt claims handling further reduce the risk of additional problems and help you move from emergency response to lasting repair as smoothly as possible.
You do not have to navigate this process alone. Snohomish Roofing Company offers rapid storm damage inspections, emergency tarping, detailed documentation, and high-quality repairs tailored to the unique conditions of Snohomish County and the greater Puget Sound region. Our team is committed to protecting your home, preserving your roof’s long-term performance, and supporting you as you work with your insurance company to restore your property.
After a Puget Sound storm, time matters. Snohomish Roofing Company responds fast to storm damage calls throughout Snohomish County. Call (360) 913-2021 or visit https://snohomishroof.com — we'll get your roof protected and document everything for your insurance claim.
SEO Title: Storm Damage Roof Inspection: Step-by-Step Guide for Puget Sound Homeowners | Snohomish Roofing Company
Meta Description: Learn how to safely inspect your roof for storm damage in the Puget Sound area. This step-by-step guide from Snohomish Roofing Company covers safety, attic checks, what to photograph for insurance, common PNW roof damage, temporary tarping, Washington insurance claims, and when to call a professional.
Meta Keywords: storm damage roof inspection, Snohomish Roofing Company, Puget Sound roof damage, Snohomish County roofing, Washington storm damage insurance claim, missing shingles, roof tarping Snohomish, lifted flashing, granule loss, gutter damage, attic roof leak, post-storm roof inspection WA